CONTENTS
Auto sampling a virtual instrument
1. Open a plug-in program by selecting the plug symbol under Track.

2. Under program, click on the field next to Plugin, select the virtual instrument that you wish to sample, and then click Select.

3. Once you have selected the plug in and its preset that you wish to sample, navigate to Tools and select Auto Sampler.
.png)
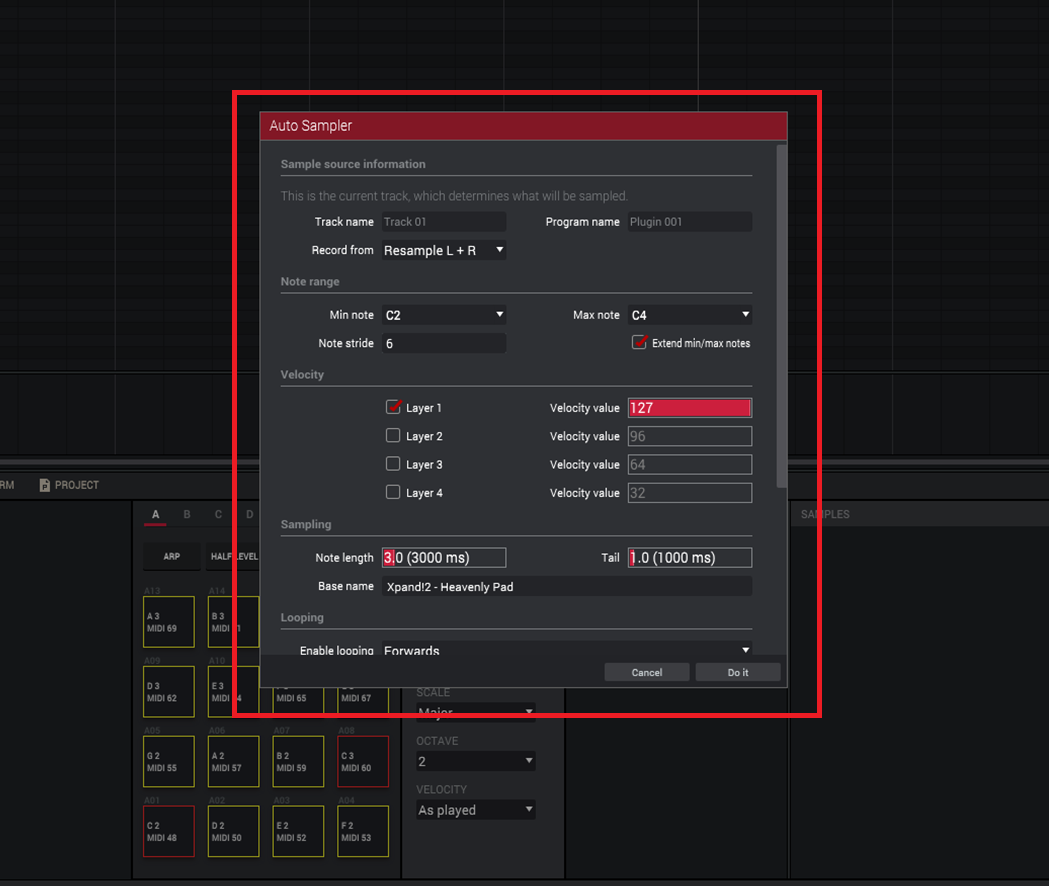
The Auto Sampler window will open and prompt you to insert the following information:
Sample Source information: This section determines what will be sampled. The currect track name and program will already be populated.
Note: Make sure to select Resample L+R as your Record from location under Sample Source information.
Note Range: Determines the Minimum and Maximum octaves to be sampled and the Note Stride.
Velocity: This section allows you to select the velocity of the notes to be sampled and allows the option to layer velocities.
Sampling: This section allows you to determine the desired Note length, including the Tail length, and what the Base name.
Note: The Base name will be the name of the keygroup program once autosampling is complete.
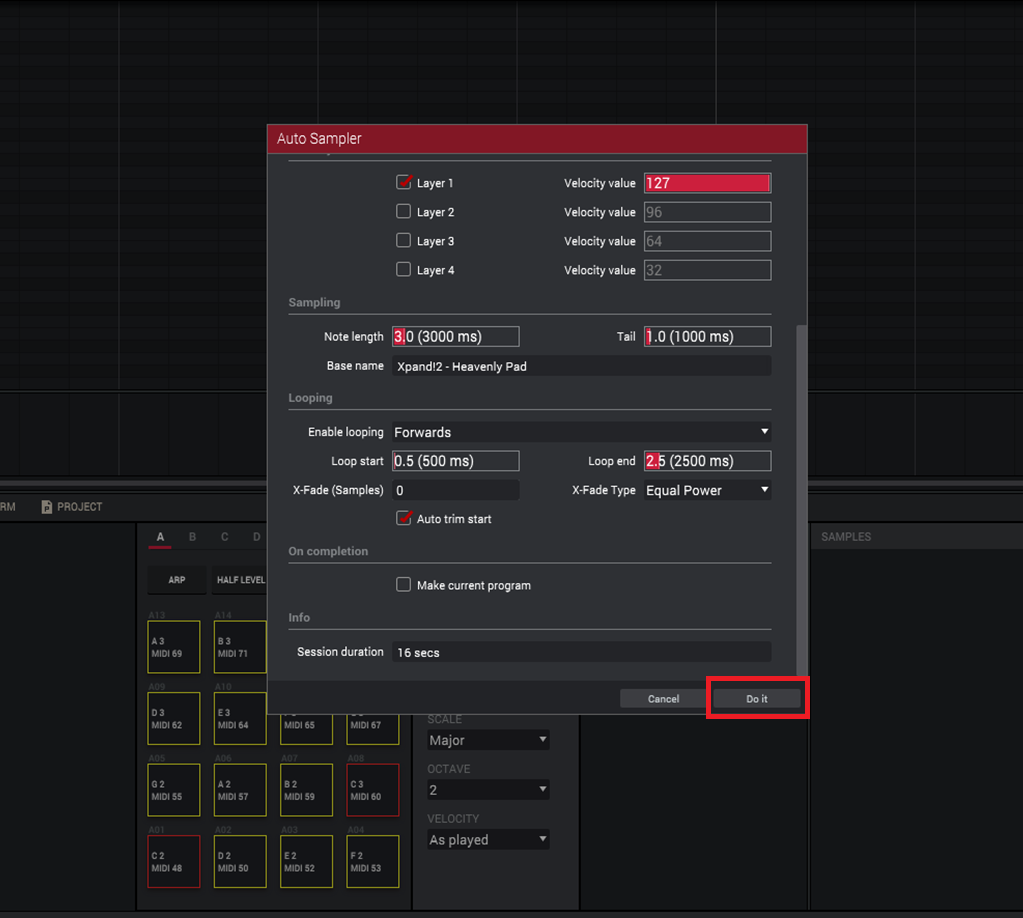
Looping: This section give you the option to enable looping of the sampled notes.
On completion: If this box is checked the keygroup program will load as the current program automatically.
Note: If this box is left blank you can manually load the keygroup program as explained below.
4. After you have entered all of the requested information, select Do it.
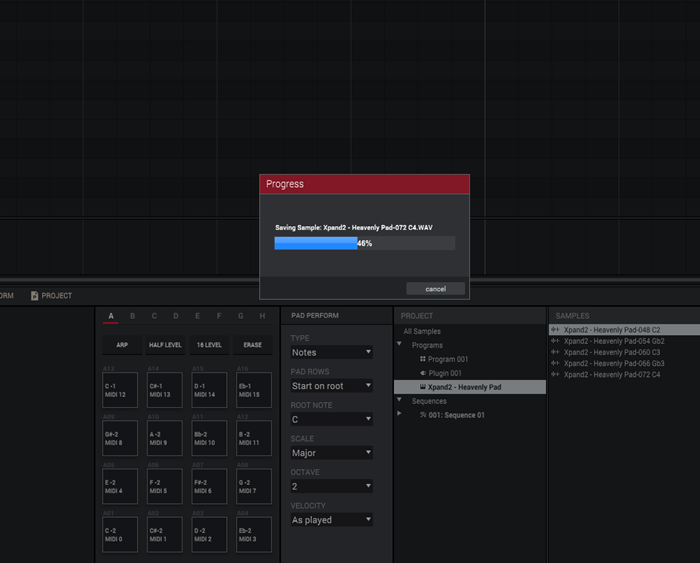
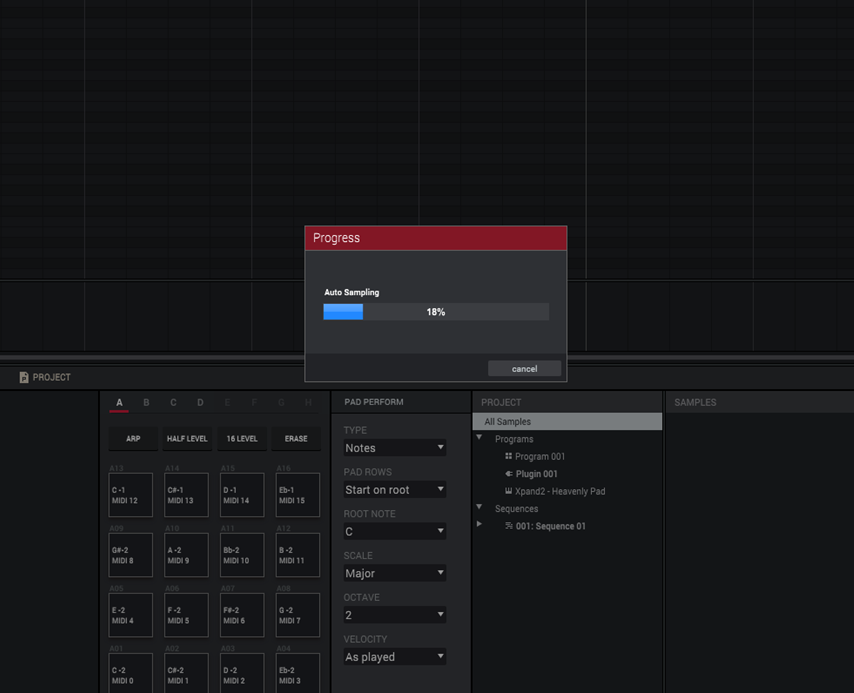
Once you've clicked Do it, auto sampling will begin.
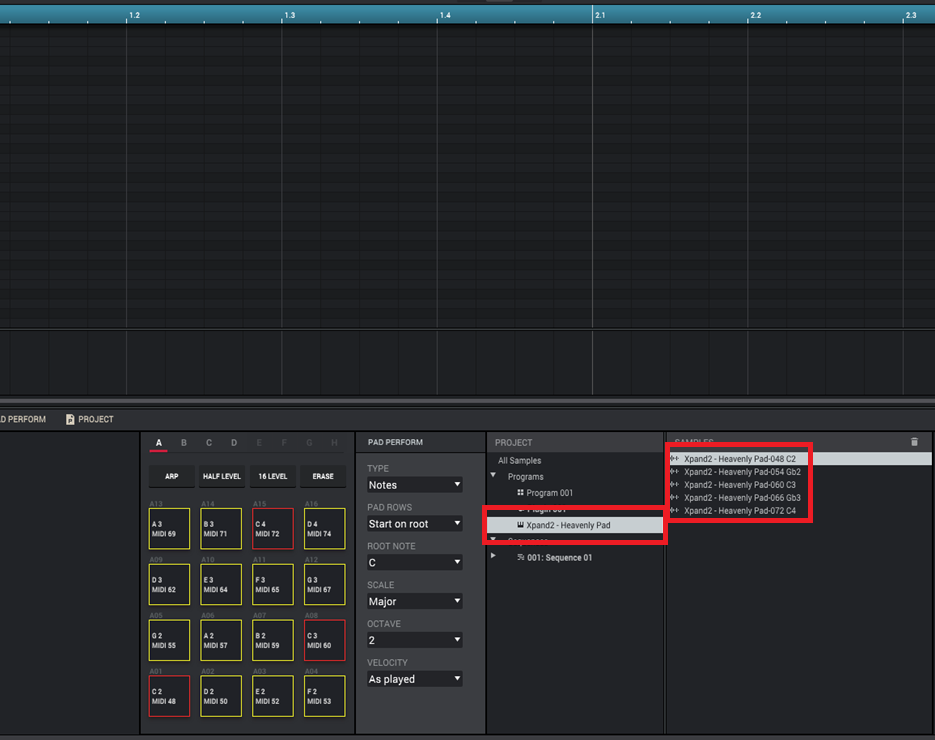
When auto-sampling is complete, you will see the new program and samples in the Project and Samples section.
Saving keygroup programs to standalone MPC
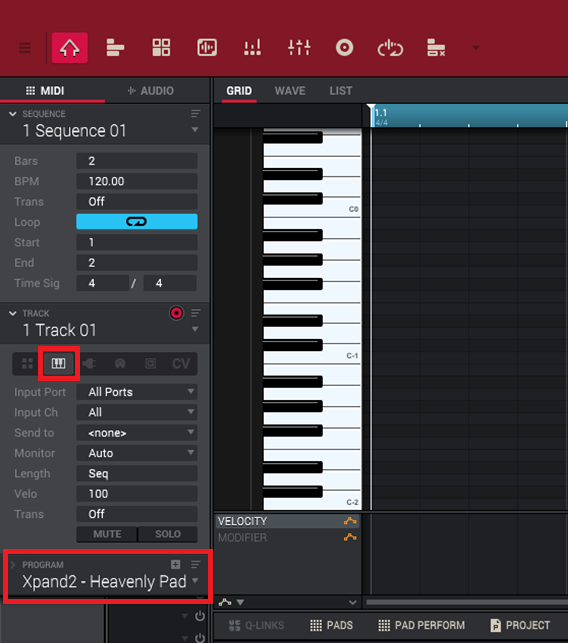
1. Use the Program drop-down to select the key group program that you created.
2. Navigate to File and select Save Current Programs...
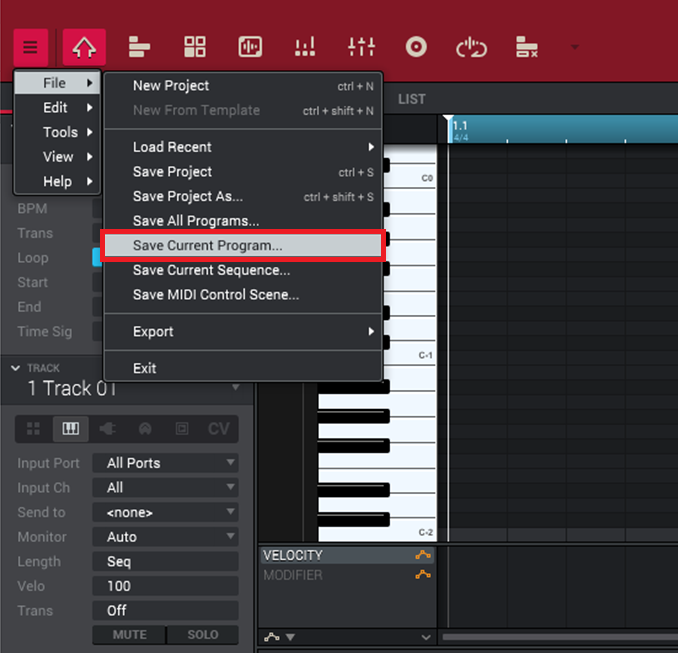
3. Select the external drive that you use for your standalone MPC and click Save.