
In this article, we will cover the steps to resolve missing samples in your project
Note: If you encounter a project is missing plug-in files error, please refer to this article: MPC Series | Project Is Missing Plug-in Files : Akai Professional
TABLE OF CONTENTS
Drive & File Management
With any type of software program - from DAWs, to design/video editing software, to general office applications like Microsoft Word. If a file is no longer in the original drive/directory, the program will not be able to recall/find the file.
If you receive the Sample Not Found error when loading a project - the first thing to check if the correct drive is connected to the MPC. Ideally, this will be the drive you used when you initially started working on your project.
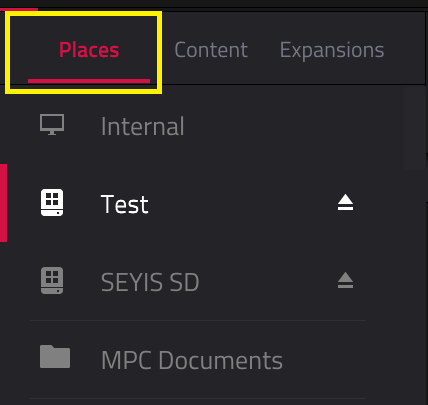
To check, go to Browser > Places

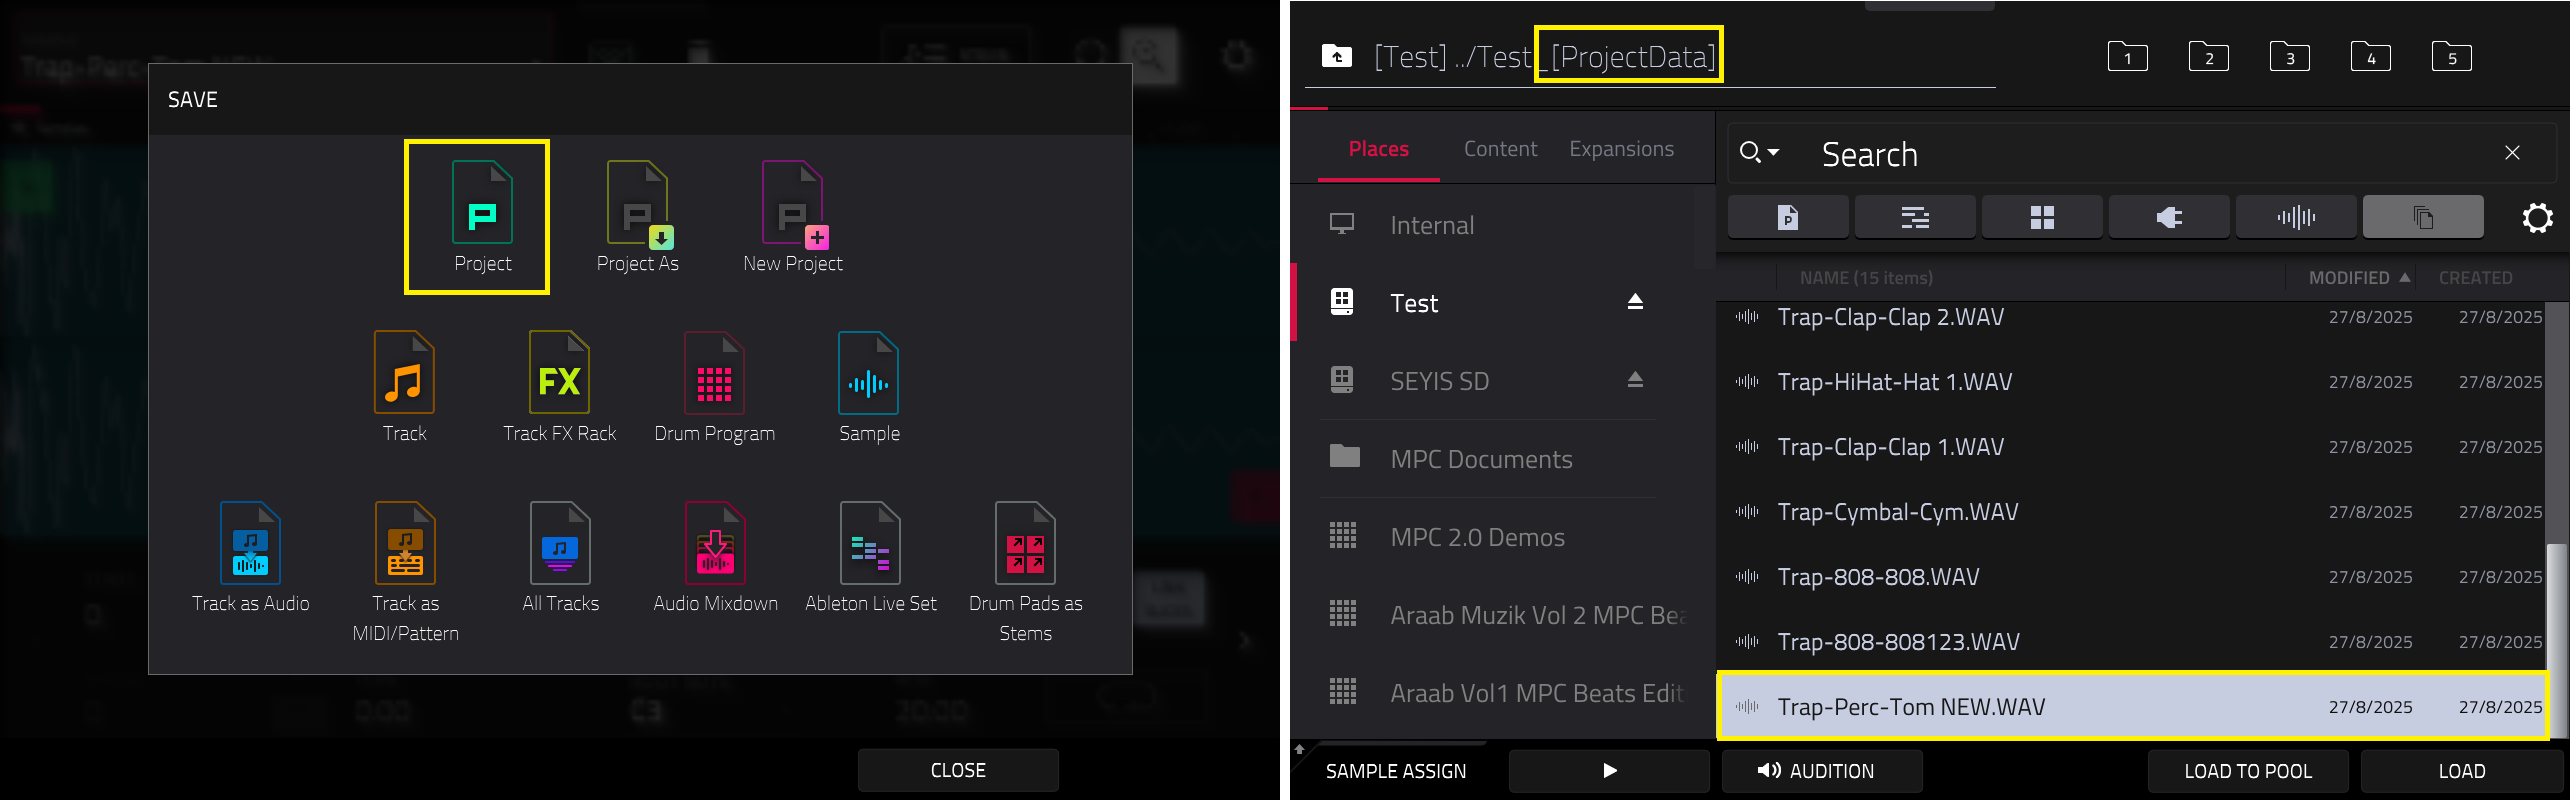
If the original drive is connected, it would be a good idea to check where the sample is stored. On default all associated samples will be in the _[ProjectData] folder.
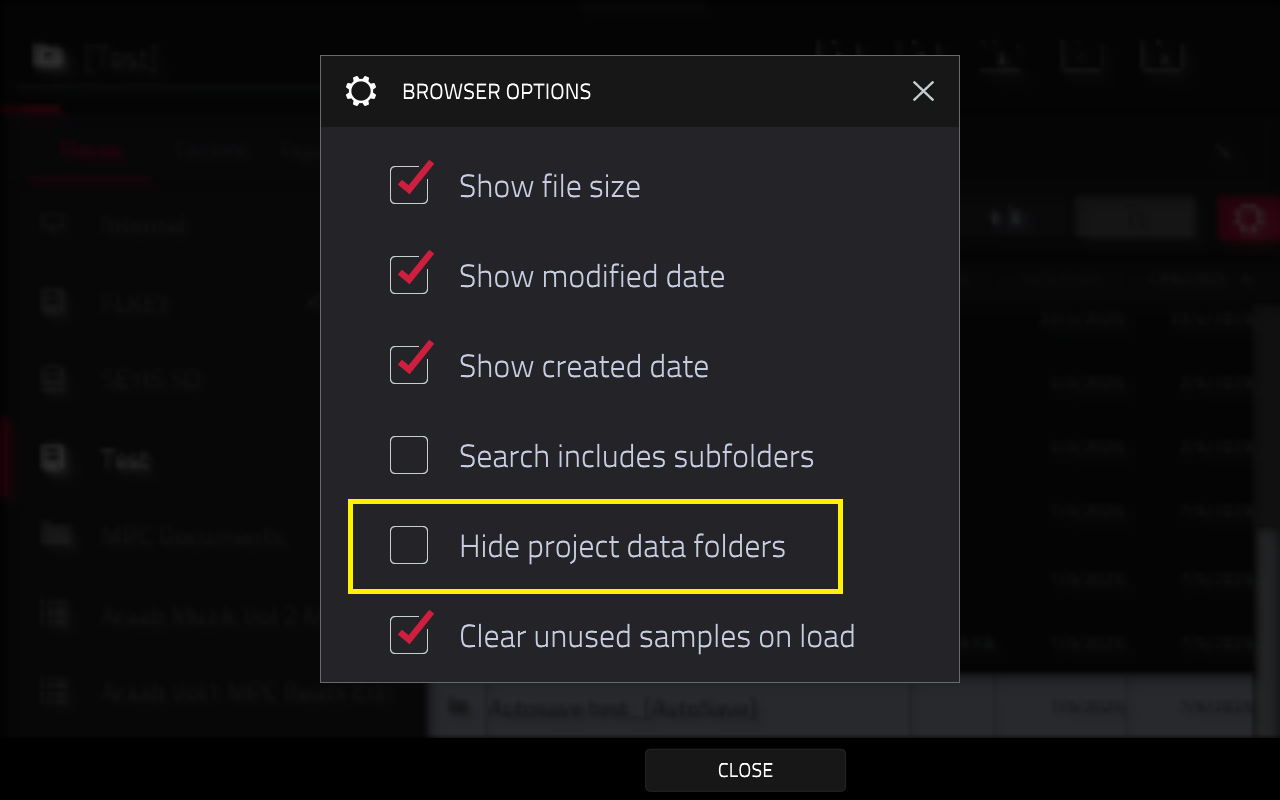
To view the _[ProjectData] folder, enter the Browser and locate your project on the drive. If you do not see the _[ProjectData] folder immediately, tap on the cog wheel (top right side of the screen).

This will reveal the Browser Options. From here, uncheck Hide Project Data Folders like so:

You should now see the _[ProjectData] folder. From here, look through the available samples.
If the sample is within the folder, load it back into the project by tapping Load.

You can also use the search bar and type in the sample name.

If you are unable to find the sample, it may have been overwritten, deleted or saved on another drive. We recommend checking any possible location that the sample may be.
Renaming Samples
With this in mind, it is also a good idea to properly name your samples before loading them into the MPC. This will act as an aide to easily identify any missing samples.
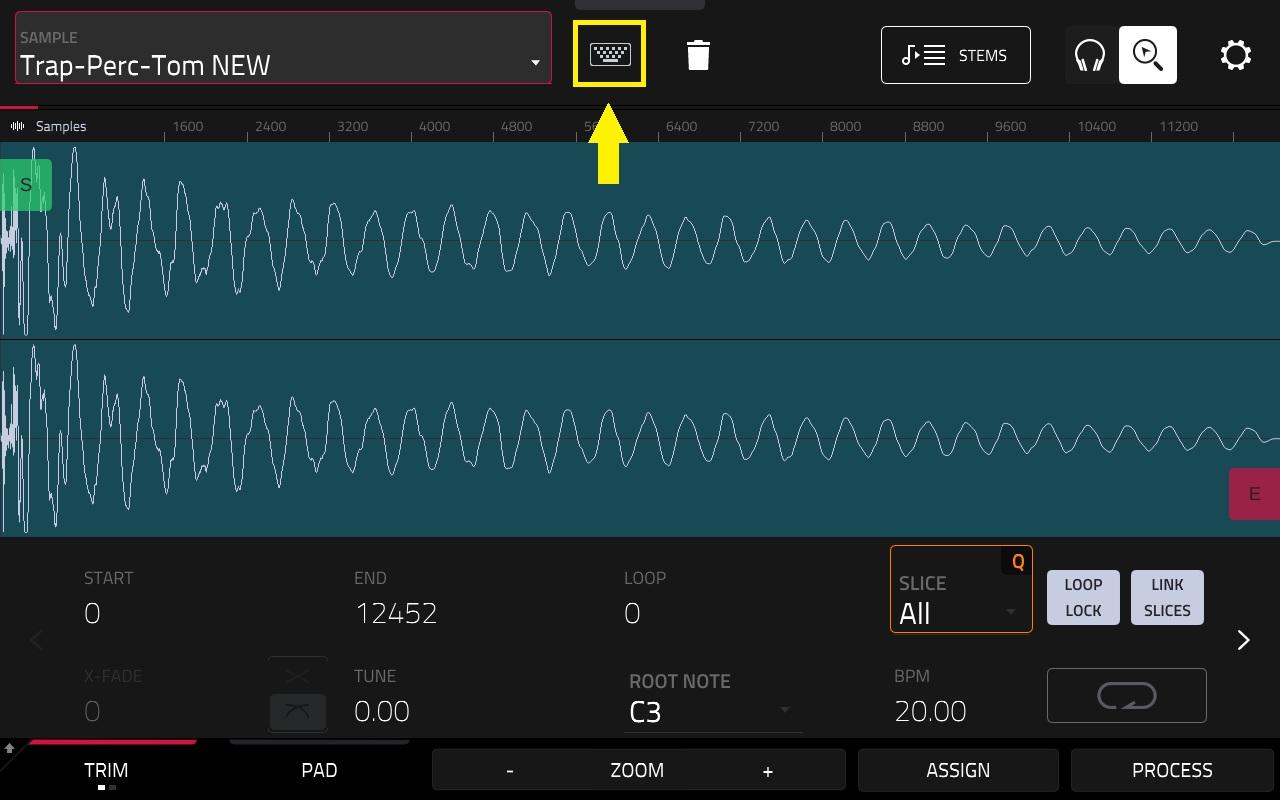
You can manually rename your samples in Sample Edit Mode using the virtual keyboard.

After this, go to Menu > Save > Project. The MPC will save a new copy of the renamed sample into the ProjectData folder.
Saving Tips: Auto and Manual Save
Auto Save
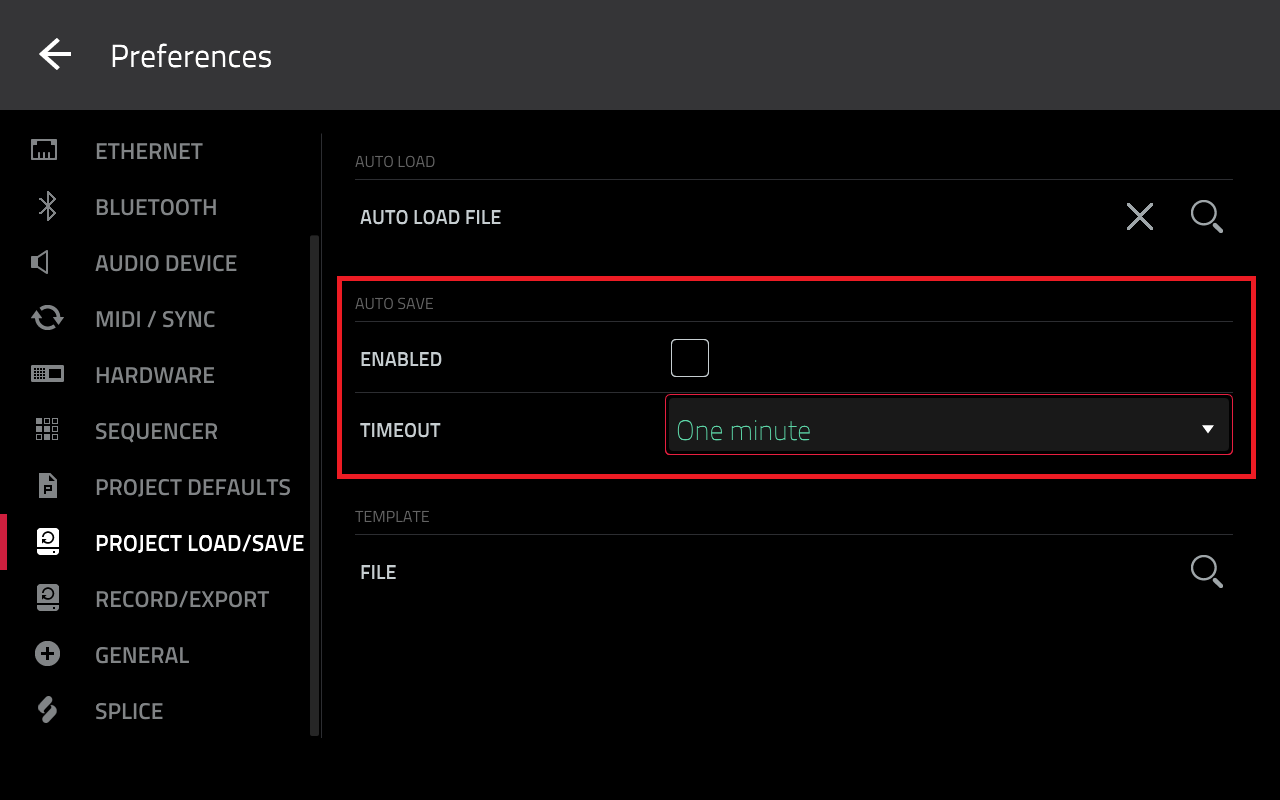
The MPC has an in-built Auto Save feature. We highly recommend enabling this via Menu > Preferences > Project Load/Save.
When auto save is enabled, your MPC will automatically save your project within a set time frame (1 min, 2 mins, 5 min and 10 mins):

Scroll down to Temporary File Location and ensure that you select a drive as this is where the MPC will store your auto saved project and ProjectData files.
Note: On default, the MPC will save your auto save projects to the Internal drive via Internal > MPC Documents > Projects.
We recommend using an alternative drive such as an SSD, HDD, USB or SD Card.

Once this has been set up, the MPC will display a save progress bar at your chosen timeout range whilst you work on your project.
Please note: In this operation, the save progress bar will appear whilst you are working and you will not be able to operate the MPC until saving has been complete:

If for any reason you need to disable Auto Save, go to Menu > Preferences > Project Load/Save.
Leave Enabled Unchecked
To locate the auto saved project, go to Menu > Brower and tap the gear icon (top-right side of the screen)
Make sure that Hide project data folders is unchecked
Manual Save
If for any reason, you need to move your project/samples to another drive, you also have the option to do this manually.
For projects: Open the project, go to Menu > Save > Project As. Save the project to your new drive location.
For samples: Go to Sample Edit Mode, find the sample in pool. go to Menu > Save > Sample. Save the sample to your new drive location.