
TABLE OF CONTENTS
- 3rd Party Plugin Support - Standalone Mode
- Direct USB-MIDI (MPC XL, MPC Live III & Key 37)
- 5-Pin MIDI Out
- Controller Mode
3rd Party Plugin Support - Standalone Mode
That said, if you'd like to use plugins from other manufacturers in your MPC project, the MPC will need to be set up with your computer/DAW as it is not possible to load/install additional 3rd party plugins into the MPC in Standalone mode.
Direct USB-MIDI (MPC XL, MPC Live III & Key 37)
MPC Key 37: The MPC Key 37 is the only Gen 1* MPC that features Direct USB-MIDI. This means it can be used as a MIDI controller in standalone mode via the USB-B port. Once the MPC has been set up for USB/MIDI control, you'll be able to use it to trigger 3rd party plugins in your DAW.
Kindly refer to this article for set up instructions: Akai Pro MPC Key 37 | Using The MPC Key 37 as a MIDI Controller
*Gen 1 MPC's are the MPC Live, Live II, One, One+, X, X SE, Key 61 and Key 37.
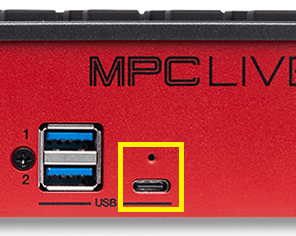
MPC XL & MPC Live III: The MPC XL & MPC Live III include the Direct USB-MIDI feature. This means they can be used as MIDI controllers in standalone mode via the USB-C port.
MIDI Set Up - MPC
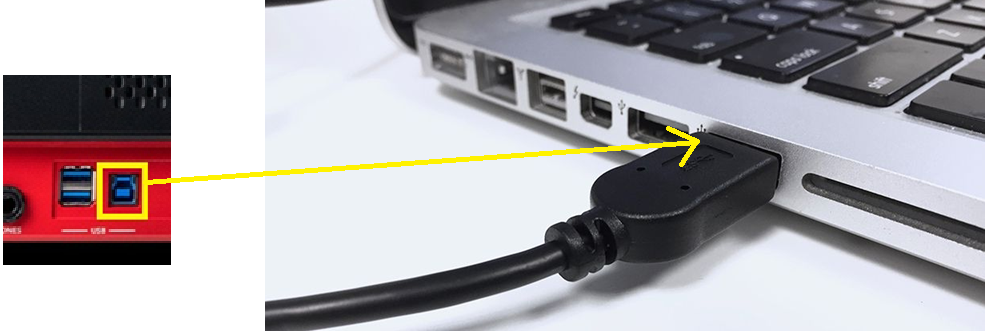
1. Connect a standard USB cable to the MPC's USB-C port, the other end should go to your computers USB port
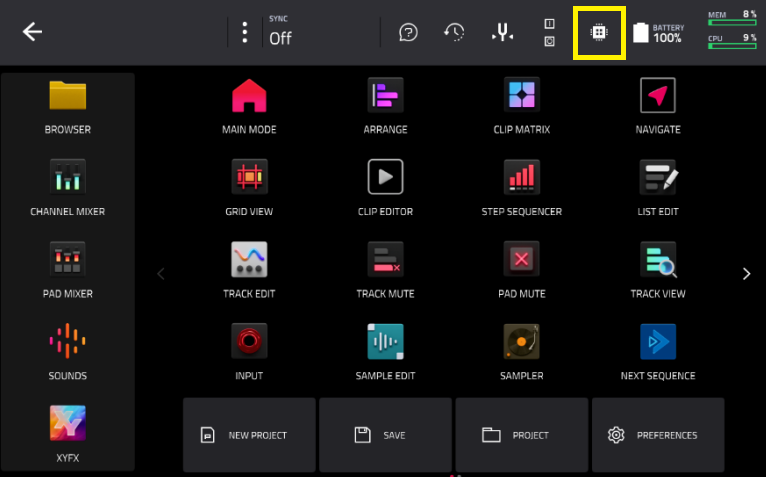
2. Ensure the MPC is in Standalone mode. To verify that your MPC is in Standalone mode, the microchip icon will be shown in the main menu like so:
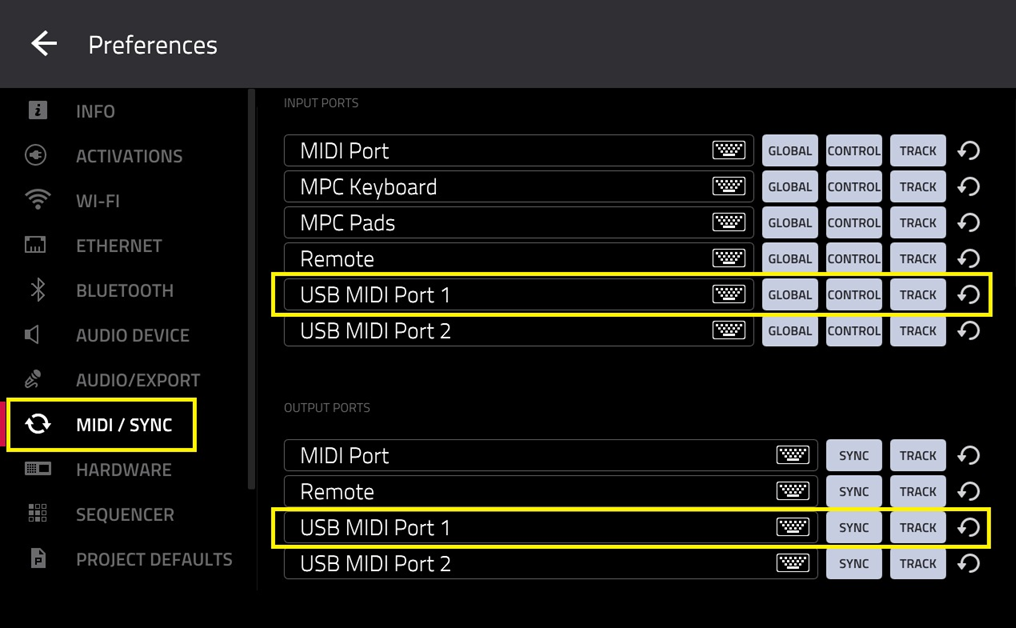
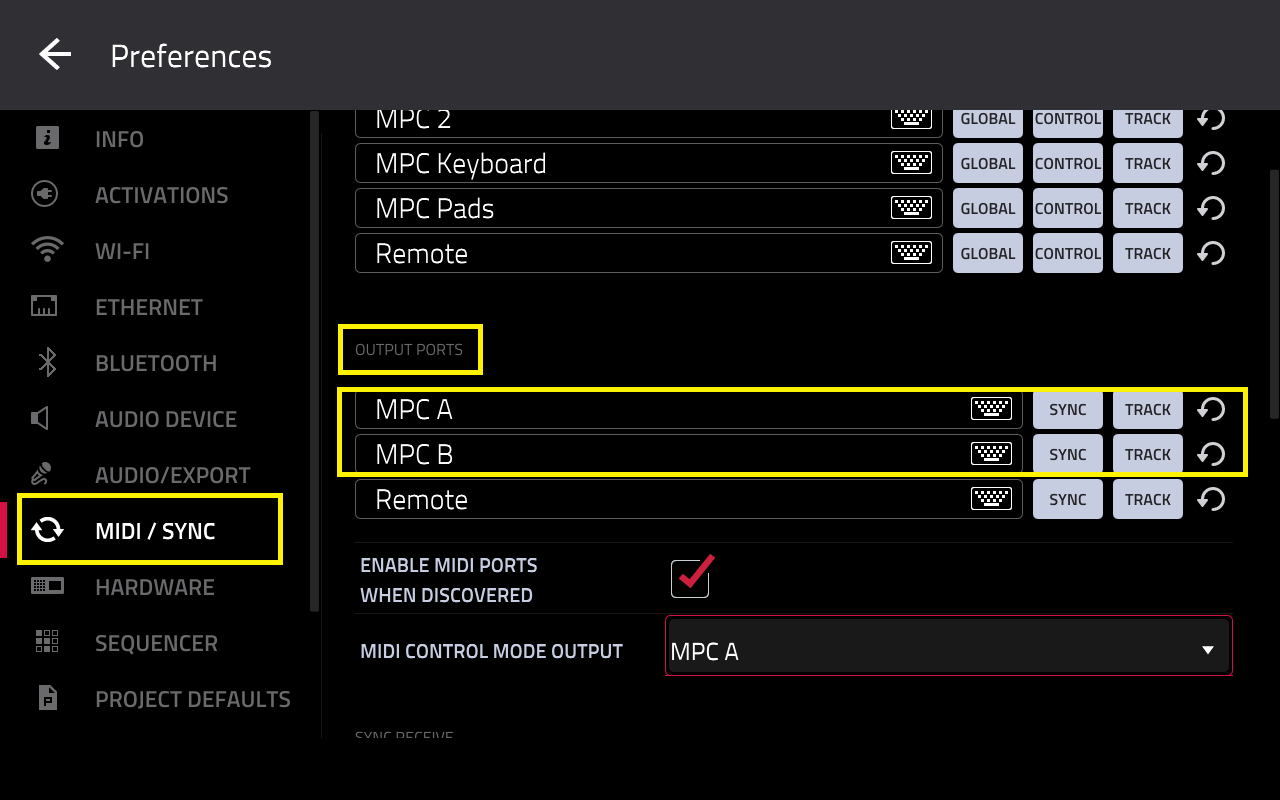
3. Go to Menu > Preferences > MIDI/Sync and configure 'USB MIDI Port 1' as seen below:
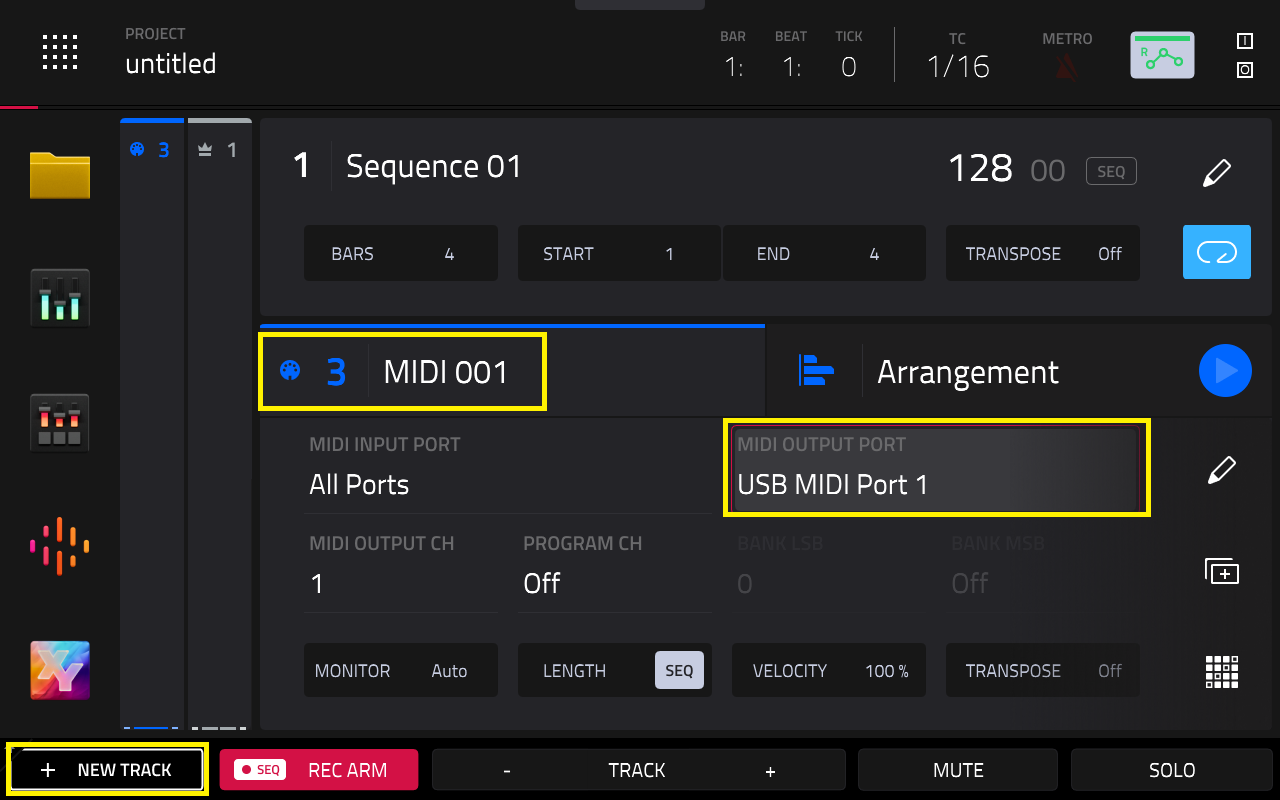
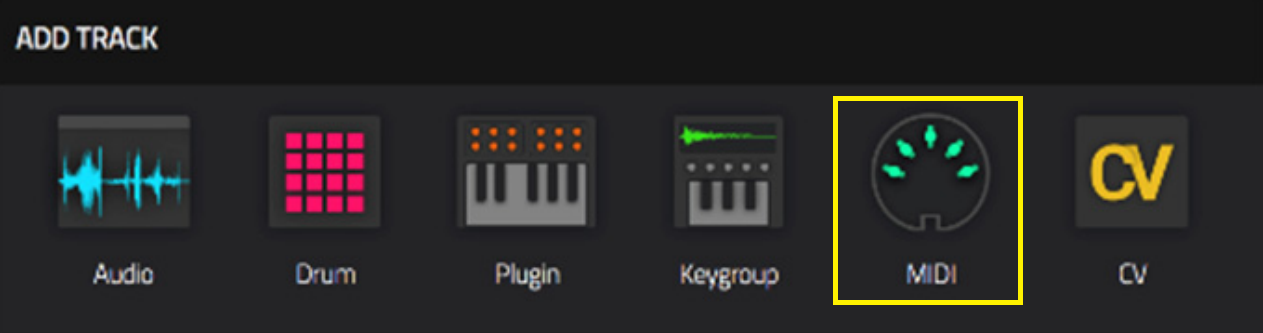
4. Return to Main Mode, and set up a MIDI track

5. Configure the MIDI Output Port to USB MIDI Port 1
MIDI Set Up - DAW
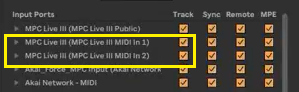
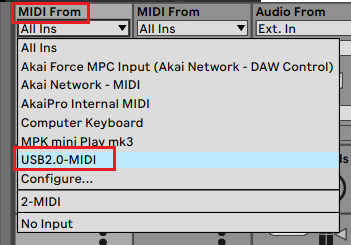
1. Go to the MIDI settings in your DAW, and ensure the MPC's MIDI ports are enabled. They should appear as MPC MIDI 1 & 2
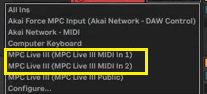
2. Return to your plugin track, and select the appropriate 'MIDI From' port for the track. In this example, we have enabled USB Midi Port 1 in the MPC's MIDI / Sync settings, so select MPC MIDI In 1 in your DAW:
3. That's it! - the MPC is now set up as a MIDI controller in your DAW using the USB-C port.
Refer to 38:10 External Plugins Using USB-C to see this set up in action!
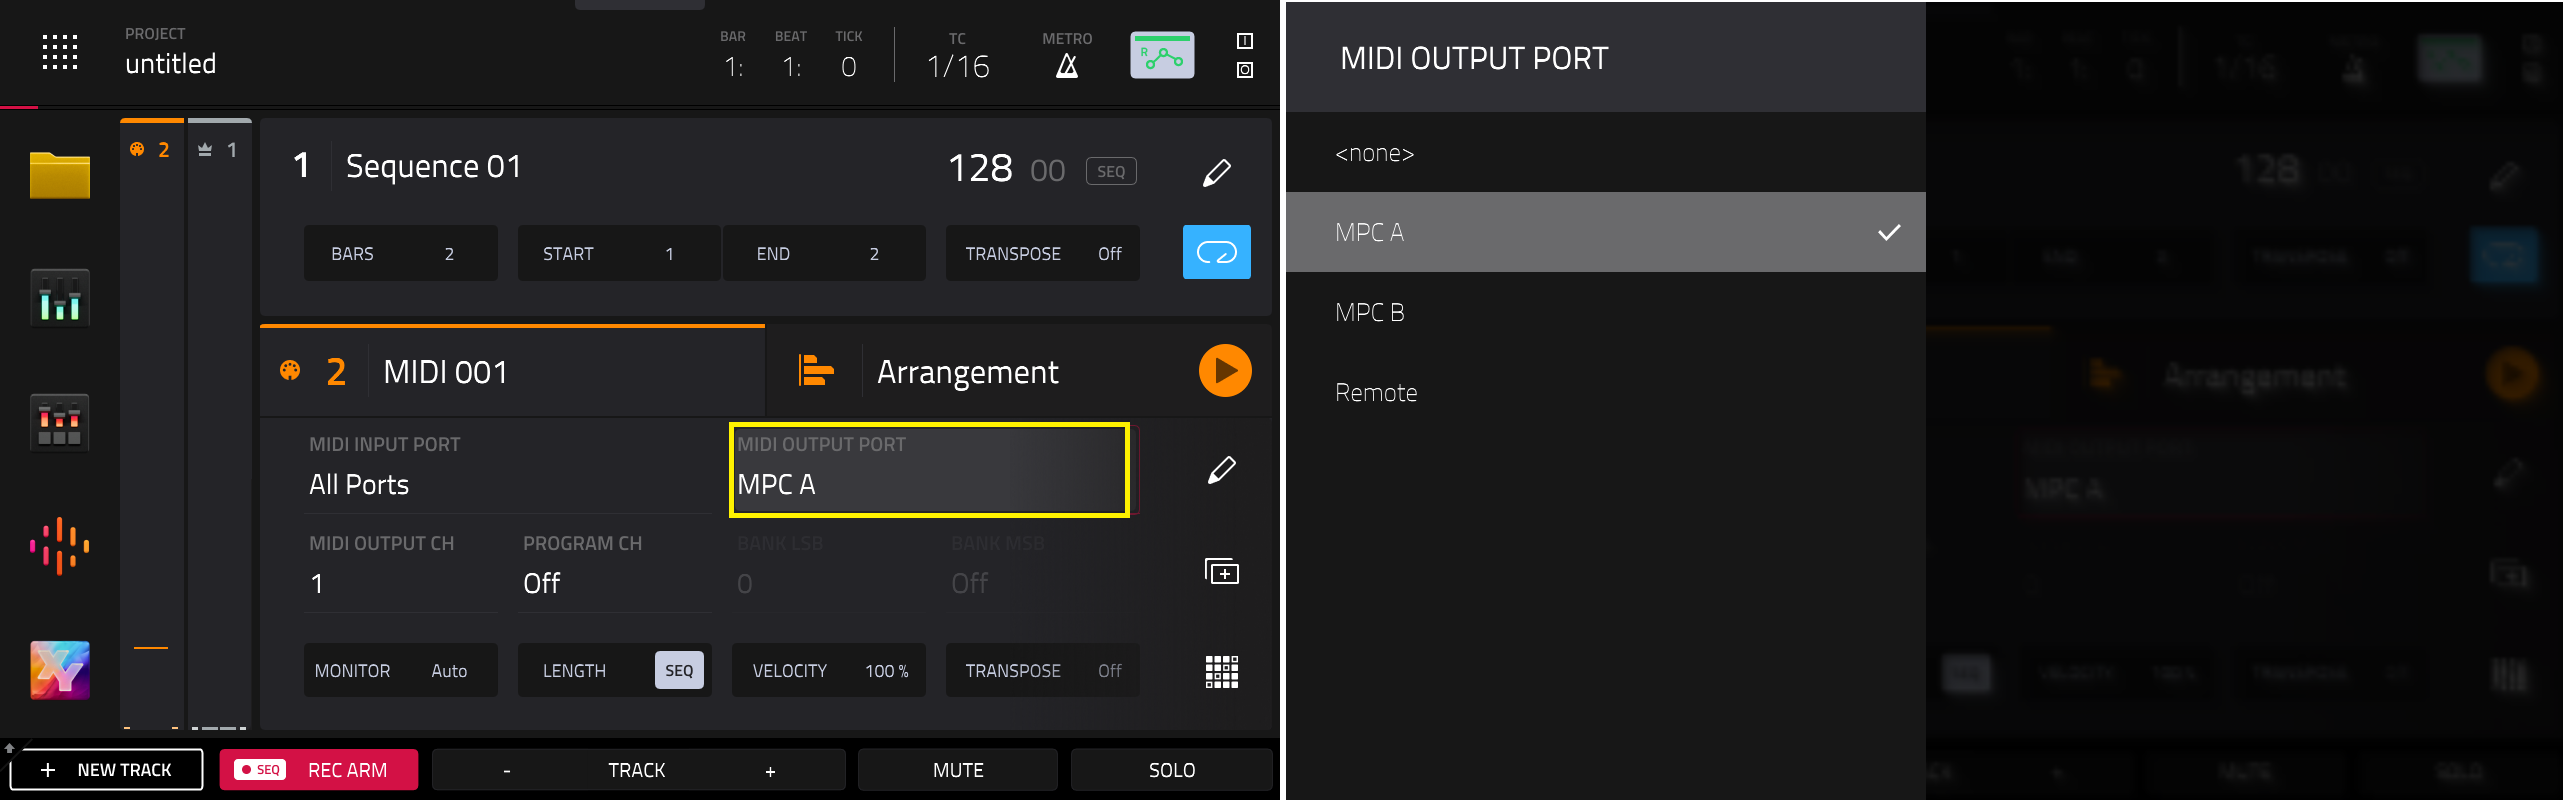
5-Pin MIDI Out
All MPC's feature 5-Pin MIDI ports. You can use the 5-PIN MIDI Out port for MIDI control to a computer/DAW.
1. To set this up, you'll need to enable the physical 5-Pin MIDI Out ports in the MIDI/Sync menu
2. Return to Main Mode and create a MIDI Track
3. Set the appropriate MIDI Output Port
4. Connect either a USB/MIDI interface or a USB/MIDI cable to a USB port on your computer.
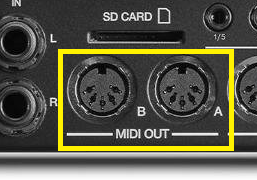
5a. If using a USB/MIDI interface, use a standard 5-PIN DIN cable and connect it to the MIDI IN port on the interface, the other end of the cable should go to the MIDI Out port on the MPC.
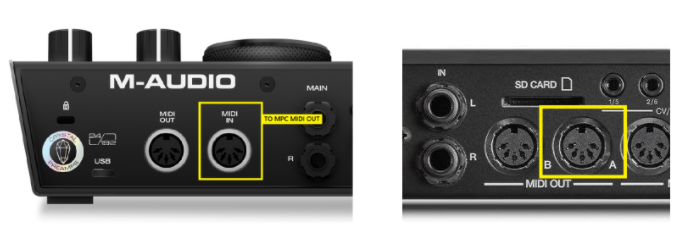
5b. If you are using a USB/MIDI cable, connect the 5-PIN portion of the cable to the MIDI Out port on the MPC.
6. Go to the MIDI settings in your DAW, and ensure the USB/MIDI interface or USB/MIDI cable ports is enabled
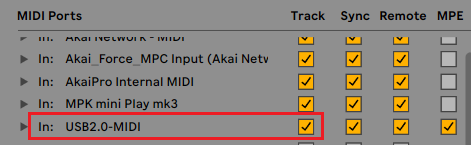
7. Return to your plugin track, and select the appropriate 'MIDI From' port for the track. You will need to select the USB/MIDI interface or USB/MIDI cable port.
8. That's it! - the MPC is now set up as a MIDI controller in your DAW using the 5-Pin MIDI Out port
Controller Mode
When the MPC is in controller mode, it interfaces with MPC desktop software. This means that all activity will be handled in the desktop software, and will be reflected on the MPC's screen/GUI.
In this set up, you can use the MPC to trigger 3rd party plugins in your MPC project - please see the steps below:
1. Connect the MPC to your computer using the USB-B port on the MPC
2. Place the MPC in controller mode by going to Menu and tap the microchip icon (top right side of the screen)

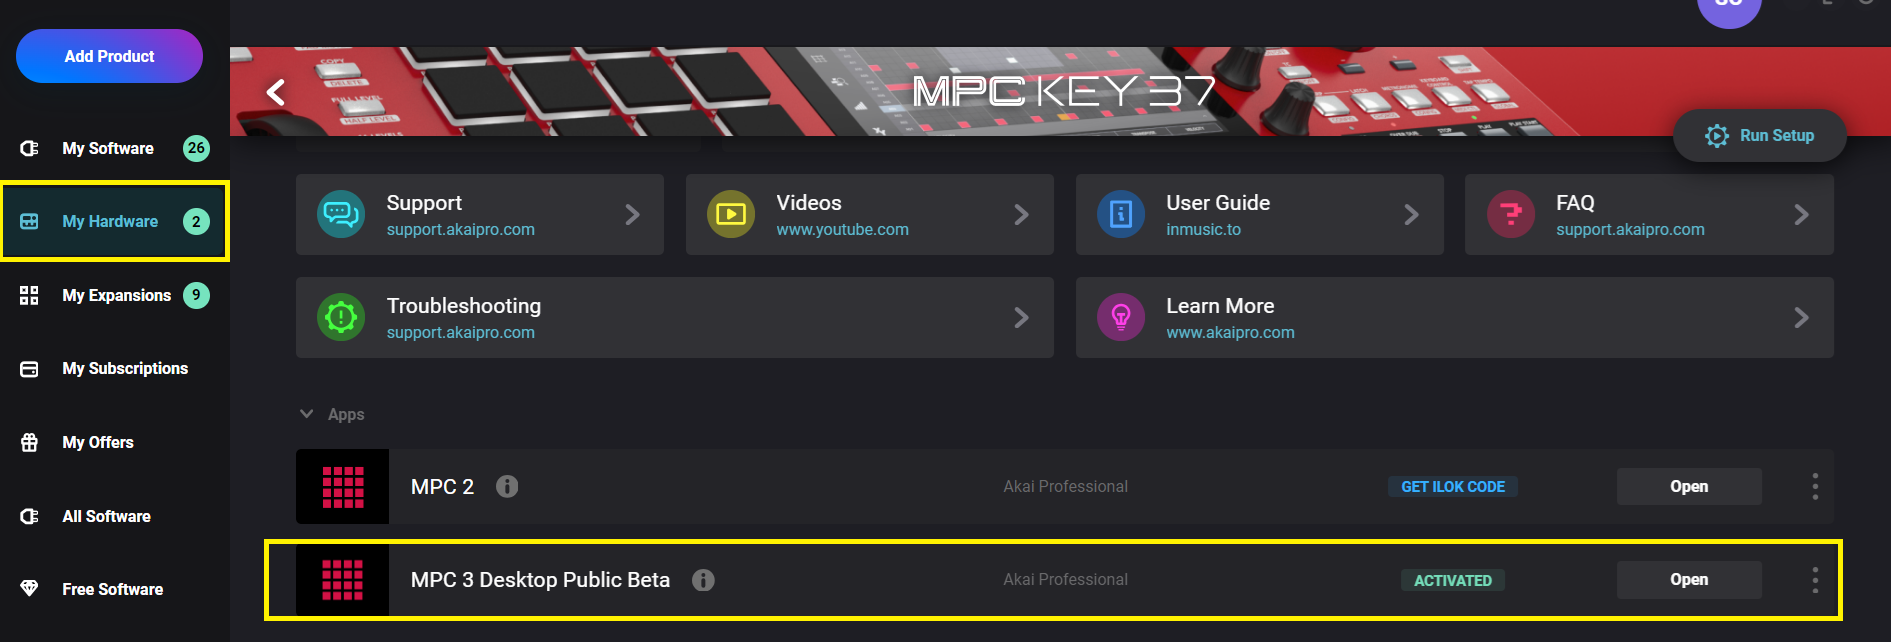
3. Open MPC 3 Desktop software. If you do not have this installed, kindly download/install it from the software center: Akai Pro | MPC3 Desktop Public Beta - FAQ : Akai Professional
Note: It is important that you use MPC 3 desktop software as this version supports VST3 plugins.
4. Scan your 3rd party plugin in MPC desktop by navigating to Preferences menu and choose the Plugins tab.
For Windows, the Preferences menu can be accessed by selecting Edit > Preferences
For Mac the Preferences menu can be accessed by selecting MPC > Preferences
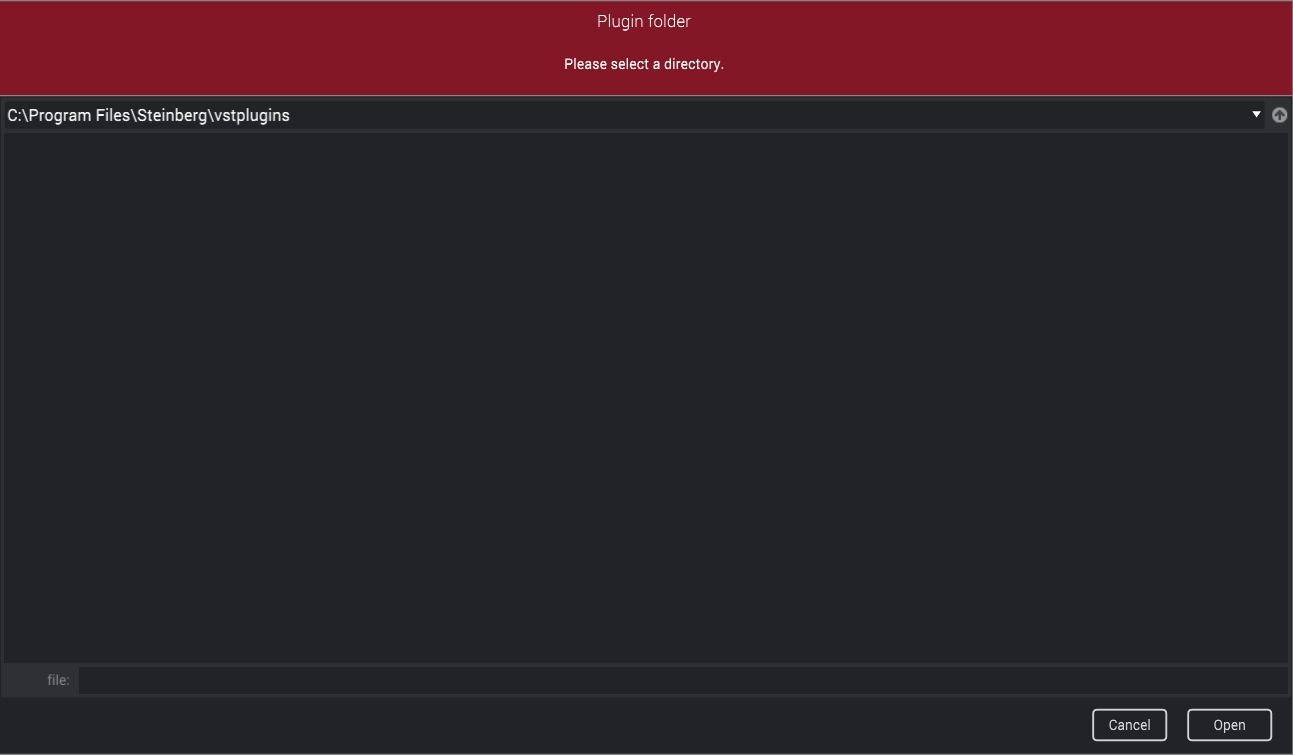
You can choose the location by selecting "..." next to an empty field and navigating to the location of your plugins.
Some common plugin file locations are included below:
Mac:
- Library/Audio/Plugins/VST
- Library/Audio/Plugins/Components (for the AU format)
Windows:
- C:Drive/Program Files/VstPlugins
- C:Drive/Program Files/Steinberg/vstplugins
Note: The directory can be different depending on where the plugin has been installed to. If you experience any difficulties with locating the plugin in your files, please contact the plugin developer.
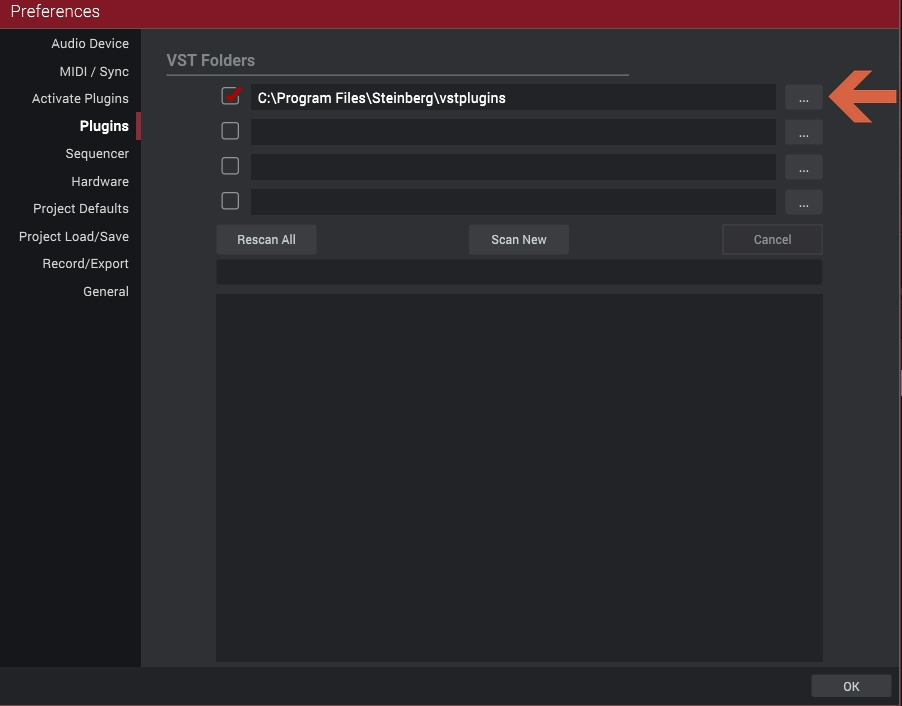
5. Once the correct location has been chosen, put a check mark in the box to the left of the selected location. Then select "Scan New" or "Rescan All"
6. That's it! you can now load your plugin into MPC software and use it in your project. Any action you take will be reflected on the MPC's screen.
Important Note: 3rd Party plugins are not compatible/cannot be installed on the MPC in standalone mode. If you wish to continue working on your project in standalone mode, bounce all tracks containing 3rd party plugins to audio tracks: Akai Pro MPC Software | How to Export Individual Tracks : Akai Professional