In this guide, we will walk through the steps to configure your MPK mini to trigger the drum pads and keys simultaneously in a DAW.
TABLE OF CONTENTS
MIDI Channels Overview
MIDI channels allow different parts of your controller to communicate independently with your DAW. In this case, the pads and keys transmit their MIDI data on different channels, meaning you can assign them to control different instruments or sounds at the same time.
For example:
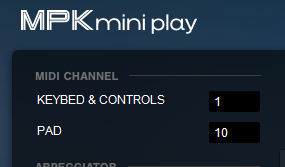
The keyboard (Channel 1) could play a piano or synth.
The pads (Channel 10) could trigger drums.
Understanding MIDI channels gives you greater control over routing and layering sounds, allowing you to perform and produce more flexibly within your DAW.
Feel free to use the below links to view the set up steps for your MPK Mini model:
MPK Mini IV
The Global Menu is used to customize the hardware device settings of MPK mini IV.
Important: These settings can only be changed for User Presets. They cannot be changed while using the DAW or Plugin Presets to maintain mapping compatibility.
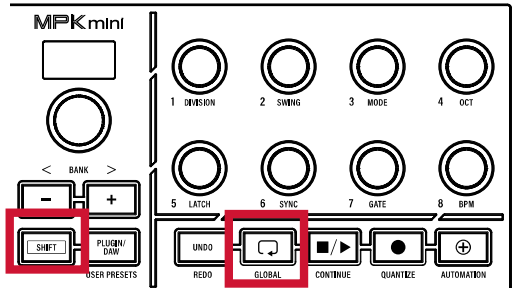
1. To open the Global Menu, press and hold SHIFT and then press the LOOP button. Use the encoder to browse and edit the following settings.
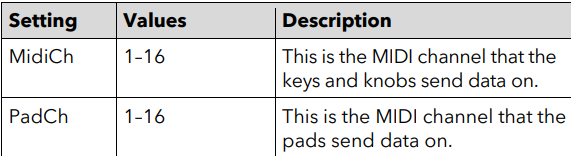
2. To change the MIDI Channel for the keys. Navigate to 'MidiCh' and select 1
3. To change the MIDI Channel for the pads. Navigate to 'PadCh' and select 10
4. To save, hold SHIFT and press the OCT + button. Use the encoder to select a User preset slot, and then press it to confirm.
5. When you are finished editing, press the PLUGIN/DAW button to exit.
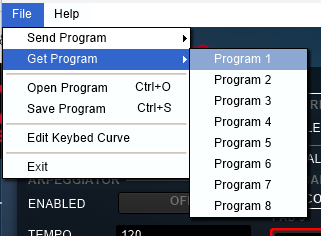
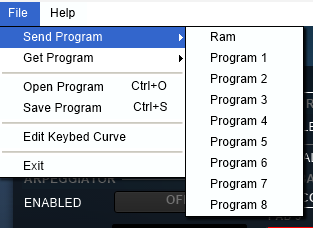
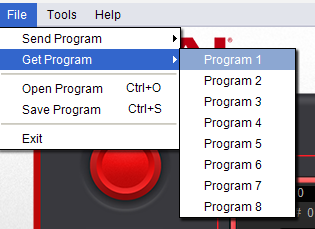
6. To load a custom program, hold SHIFT and press the PLUGIN/DAW / USER PRESETS button. Use the encoder to browse and select the desired preset from the list.
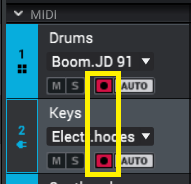
- Set one track to MIDI Channel 10 (for pads)
- Set the other track to MIDI Channel to 1 (for keys)

- Ensure both tracks are record-armed (this allows you to play MIDI on both tracks at the same time)
After this, you should have the ability to play both the keys and pads simultaneously.
MPK Mini Plus
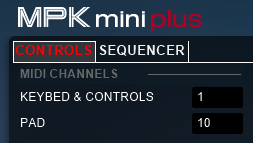
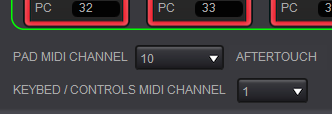
- Set one track to MIDI Channel 10 (for pads)
- Set the other track to MIDI Channel to 1 (for keys)
- Ensure both tracks are record-armed (this allows you to play MIDI on both tracks at the same time)
After this, you should have the ability to play both the keys and pads simultaneously.
MPK Mini III
- Set one track to MIDI Channel 10 (for pads)
- Set the other track to MIDI Channel to 1 (for keys)
- Ensure both tracks are record-armed (this allows you to play MIDI on both tracks at the same time)
After this, you should have the ability to play both the keys and pads simultaneously.
MPK Mini Play Mk3
- Set one track to MIDI Channel 10 (for pads)
- Set the other track to MIDI Channel to 1 (for keys)
- Ensure both tracks are record-armed (this allows you to play MIDI on both tracks at the same time)
After this, you should have the ability to play both the keys and pads simultaneously.