
Contents
- Getting Started
- Loading the Logic Pro X Preset
- Installing the Control Surface Preference File
- Current Mapping Assignments
- Additional Mapping Resources
Getting Started
For your convenience, we've put together a preset file and Logic Pro Control Surface Preference File to easily map the controller to paramters in Logic Pro X. The files can be downloaded through the link below:
Keep in mind, this will come in a zipped folder. Please make sure to double-click on the folder to unzip it once it has completed downloading. In order to load the preset file onto the MIDIMix, you will also want to download and install the MIDIMix Editor. You can download the editor directly from the link below:
Loading the Logic Pro X Preset
2. Close all other Audio/MIDI software, including Logic and launch the editor.
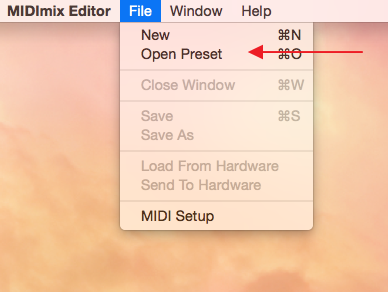
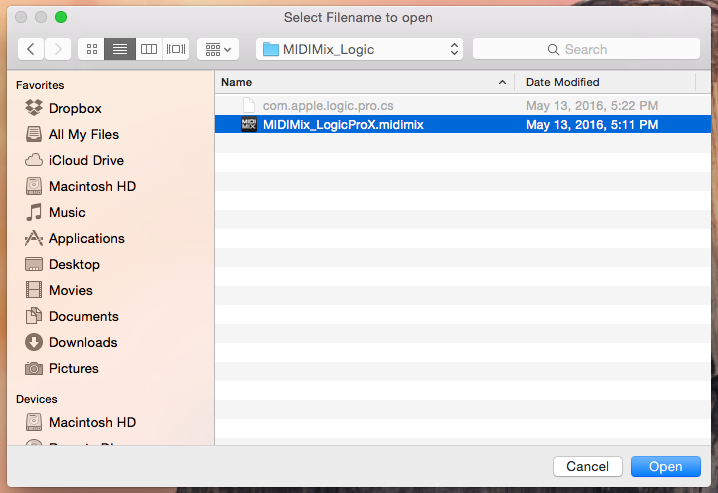
3. From the top left of the editor window, select File > Open Preset.
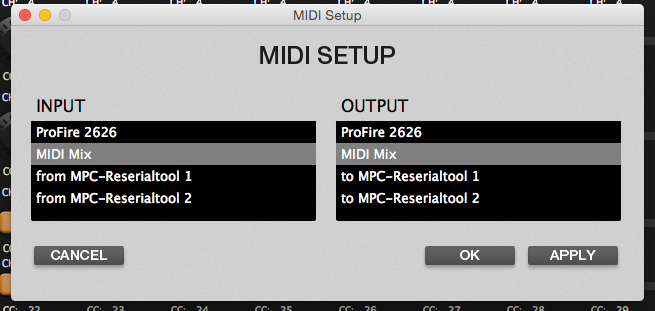
6. If asked to select your MIDI ports, choose the MIDImix option in the Output section and click Apply and OK.
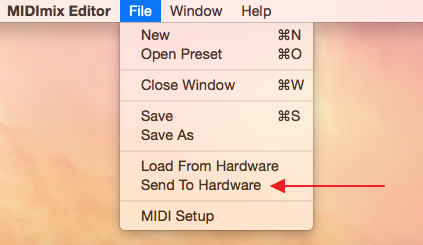
Your preset should now be loaded and you are ready to install the control surface preference file! For more information on useing the MIDIMix Editor, please be sure to go through our Using the Editor guide.
Installing the Control Surface Preference File
Important: In order to share a mapping profile for Logic Pro X, the control surface preference file must be replaced. This will overwrite any "learned" control assignments previously made in Logic Pro X.
- Close Logic Pro X.
- Open a finder window and click on Go at the top of your screen.
- Hold down the Option key and click on Library when it appears in the list.
- In the window that appears, navigate into the Library and find the Preferences folder.
- Find the com.apple.logic.pro.cs file in your MIDIMix_LogicProX folder and drag it into this Preferences folder. This should replace an existing file of the same name in this folder. If given the option, make sure to select Replace and not Rename.
Now, you should be able to open Logic and it will automatically load this new preference file. Once it's loaded (this may take a few seconds), you should start to see response from the faders, knobs, and buttons. To check the current assignments in Logic, navigate to Logic Pro X > Control Surfaces > Controller Assignments. Click on the Expert view and the window should look something like this:

Current Mapping Assignments
MIDIMix | Logic Pro X |
Faders 1-8 | Track Volume 1 - 24 |
Master Fader | Master Volume |
Rec Arm | None/User Assignable** |
Mute | Track Mute 1 - 24 |
Solo | Track Solo 1 - 24 |
Bank Left | Moves controlled bank left by 8 tracks |
Bank Right | Moves controlled bank right by 8 tracks |
Knobs (Bottom) | Track Pan 1 - 24 |
Knobs (Middle) | None/User Assignable* |
Knobs (Top) | None/User Assignable* |
* Parameters labeled as "User Assignable" were left blank to allow users to map these controls as they see fit. Some suggestions may include paramaters for instrument or effect plugins, track EQ settings, or Track sends. See the Additional Mapping Resources section for more info on mapping these out on your own.** Logic Pro X does not offer the track record arm function as MIDI assignable. The buttons were left unassigned to allow the user to decide how best to utilize them.
Additional Mapping Resources
The scope of your project may grow larger than the provided mapping or you may find that the mapping does not meet your personal needs. Maybe you want to assign the extra knobs to your favorite EQ or maybe you'd like to assign the REC ARM buttons as your transport. Not to worry! Logic offers plenty of resources to edit the current map, build off it, and even create your own mapping just by using their MIDI Learn features and the Controll Assignments menu. We've gathered a few resources to help you dive into this on your own:
- 9to5mac.com - How to Control Anything in Logic Using Your Hardaware MIDI Controller
- Logic Pro Expert - Making Multiple Controller Assignments - The Loudness Curve
- Smart Controls in Logic Pro X
- Logic Pro X Tutorial - Controller Assignments (Youtube)